Sign in to GlobalProtect (before logging into the computer)
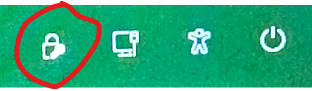
Make sure the computer is connected to some network (any network will do). You'll know you're connected because you'll see either a Wi-Fi icon or the Ethernet Icon, not the network disconnected icon. If you see the disconnected icon, click that, and get connected to a Wi-Fi network.To connect to GlobalProtect, click the new Network Sign in button in the lower right hand corner of the screen (it looks like a lock with a key, see below). If you do not have that icon, please reboot and see if it shows up. If you still don't have it, then contact ETS as you probably have an older version and we can update it so you are able to logon to the VPN first.
Follow the prompts to log in to GlobalProtect with your NetID.
When it's connected, click the Back button to go back to the normal Windows logon screen.